Please excuse my serious delay between posts. I was in London all week, and then arrived just before Easter, had a pig out and am now back in the real world!
I attempted to make some passionfruit daiquiri macarons and margarita macarons... but I didn't feel like my fillings had a strong enough bacardi/tequila taste to them... so they were therefore not worthy of blogger-ing!
I bought Pierre Herme's book of macarons (in French... out of pure desperation)! and have spent many hours looking at all of the pictures, attempting to understand the recipe with my limited GCSE knowledge of the french language.
My chocolate-hating friend (crazy girl) wanted to make some macarons with me before going back to uni... so she picked the famous MACARON ISAPHAN from the 'bible'. So my job was to make them.
Normally I make half a batch of macarons as that always seem to be enough. However, this time, I was persuaded to make a whole batch... macaron mania!
SO, the onto the Macaron Isaphan.
The first thing I made was the filling. (this recipe was my take on the original, but tastes just as good)
2 cans Lychees
400g White Chocolate
60g Double Cream
4 teaspoons Rose water
(30g Butter) (read on to understand need for brackets)
Raspberry jam
Fresh raspberries
1. Drain the lychees. (Keep some of the juice. 100ml will suffice)
2. Blitz/Blend/Process the lychees into a puree. This puree is quite liquidy and runny. So I poured it into a sieve and removed some of the lychee juice that was straining out.
3. Put puree into container and leave to one side. (240g is needed. If you have too little then make up the weight difference with the juice that you had kept. The remaining juice/syrup can be disposed of)
4. Melt the chocolate over a bain marie
5. While chocolate is melting, put rose water, lychee puree, and cream into a pan and heat.
6. When chocolate is melted remove from bain-marie. To prevent chocolate burning remove from bain-marie when there are still some lumps in chocolate. Continue to stir and lumps should melt.
7. Bring cream/lychee/rose mixture close to boiling. Remove from heat.
8. Add hot mix to chocolate in thirds. Only add more once previous addition is totally encorporated. DO NOT WORRY if chocolate 'burns' and forms a hard dough like consistency. As you continue to add hot mix SLOWLY, chocolate should return to previous consistancy.
9. Pour into shallow dish, cover with clingfilm (make sure the clingfilm is touching the ganache. A bit like a duvet!) and put in fridge.
Then move onto the shells. Click here for macaron recipe. (Double if you want far too many macarons1)
ONLY DIFFERENCE... add your food colouring (pink) to almond paste before setting aside. Colour will dilute when you add white meringue, so make sure paste is a darker shade to how you want them to be.
Once I piped my macarons, I sprinkled them with brown sugar before they had time to crust. This looks very pretty. :D
If you are doing a full batch, be prepared for several oven sessions! Also, Try not to pipe all your macarons at once, start piping 15 minutes before they go in the oven as, if they have to much time to 'crust' they may stick to the paper, preventing feet. DISASTER!
I then checked on my ganache... it was still too runny. SO, I peeled off the clingfilm. Melted my butter (amount mentioned above) and mixed it in to my ganache. I then put it back into the fridge and left it for another 20 minutes. It was then perfect piping consistency!
If you leave your ganache to long... bring it out and leave it for 30-40 minutes to warm up slightly before piping. I am normally VERY impatient and just go ahead... but it seriously alters how they look.... NOT TO BE DONE AGAIN!
When piping your isaphan beauties this is how you do it
1. Pipe a ring of ganache leaving a hole in the middle.
2. Fill hole with raspberry jam (use a sandwich bag if you don't want to waste a piping bag) but make sure you cut a TINY hole for the jam to come out of.
3. Put a quarter of a fresh raspberry in the raspberry jam.
4. Assemble with lid.
They should look LOVELY.
My friend took the photos and has now gone WITH the photos, but I shall add them when I get them off her.
Good luck macaroners!!!
xxxxx
Thursday, 28 April 2011
Thursday, 14 April 2011
Ganache ganache ganache!
Hiya macaroners,
I am going to a mates for a dinner party tonight, and I thought, 'why don't i take some macarons?'... They look great, (will hopefully taste good), and saves his doing pudding. Now then, the food menu seems to be very italian based... anti-passti, pizza and a homemade ice cream cake. Can anyone help me out and let me know exactly what an ice cream cake is? Clueless over here.
So... I have my chocolate macarons from the other day. I also realised that i made a mistake with the ganache. Last time I used 1:1 ratio of choc to cream... and it didn't set. In a previous ganache (chocoale passionfruit) it was 4:2:1 choc:passionfruit juice:BUTTER...so i decided to add some butter to my ganache. Not much... but enough.. and now it is too hard for my liking! So... for my next ganache I am going to use 2:1 choc:cream. If there is any more liquid added (i.e. juice etc.) then I am going to experiment by adding a LITTLE amount of butter to compensate for it!
I'll let you know how to goes!
xxx
Monday, 11 April 2011
OH MY GOSH... SUCCESS!!
So, I just made my first successful batch of macarons! About ruddy time too!!
It didnt start off well though. Due to my excessive number of previous batches, my almond supply was running low. So low, that I only had enough for a third of a batch. (50g). So, I had to measure everything VERY precisely... separating my egg whites into two bowls of 18g. So if you think egg white separation is normally fiddly, this was even more frustrating!
So yeah, I followed the recipe, with a third of everything, having to add 12g of water! Thank goodness for digital scales!
I tried to make white chocolate and raspberry macarons... but kinda mucked up the ganache (first time that has happened)... so if its not the shells that fail on, its the ganache! (it was just a little too runny for my likings... I mean... with chocolate and cream, you can't go all that wrong)
I only remembered to take one photo! So with my next batch, I will take photographic evidence of every step and add it to the recipe.

So, here are my piped beauties! And yes, due to my almond problem, they were all I had. (You can imagine how scared I was to put them in the oven. If the temp was wrong, or I forgot about them.. they'd be ruined with none to fall back on!
But, fundamentally they worked out well.
And now, finally, I can start to make all the sun flavours and colours and really experiment... WOOHOO... it paid off!
Next batch, I promise more pics!
Recipe... French or Italian
Before I jet off and make my macarons... a recipe might be helpful! Will add pictures when I make next batch.
Macarons can either be made with French (not with syrup) or Italian (sugar syrup) meringue recipe. Pierre Herme uses the Italian method, and so doea Ladymacaron20ten... therefore, I decided to start there!
Two of my failed batches were made with the french meringue method, and I didn't feel very comfortable with it. It is much easier to overbeat this batter... which makes it too runny, and then causes cracks in your little creations! The Italian method provides a little more slack for first timers... (i think they have a better texture too) So if I were you, go for the Italian method!
Before you start, prepare your baking tray and piping bag.
Baking tray... draw circle outlines (3.5cm diameter) on a few pieces of paper... I recommend using your computer and printing it out... it's a time saver. This is your template. Put these on baking tray and cover with a layer of baking paper (NOT greaseproof paper, as this is NOT the same thing)
Piping Bag... cut end of piping bag, and insert nozzle. Make sure that nozzle is firmly in.
So, here is the recipe for the Italian method...
Ingredients
For 'almond paste' For meringue
150g Ground almonds 150g caster sugar
150g Icing sugar 37ml (37g) water
55g Egg whites (Colouring of choice)
55g Egg whites
So this recipe consists of two constituents, the 'almond paste' (official name, Tant pour Tant), and the meringue.
Make almond paste...
1. Separate eggs into yolk and whites. In two small bowls weigh out EXACTLY 55g of the whites into each. (This can be fiddly, you have been warned!). One of these bowls of egg whites will be used for the paste, the other, for the meringue
2. Weigh out 150g of ground almonds.
Weigh out 150g of icing sugar.
Add almonds to food processor, and process for 3 minutes, until almonds are very fine.
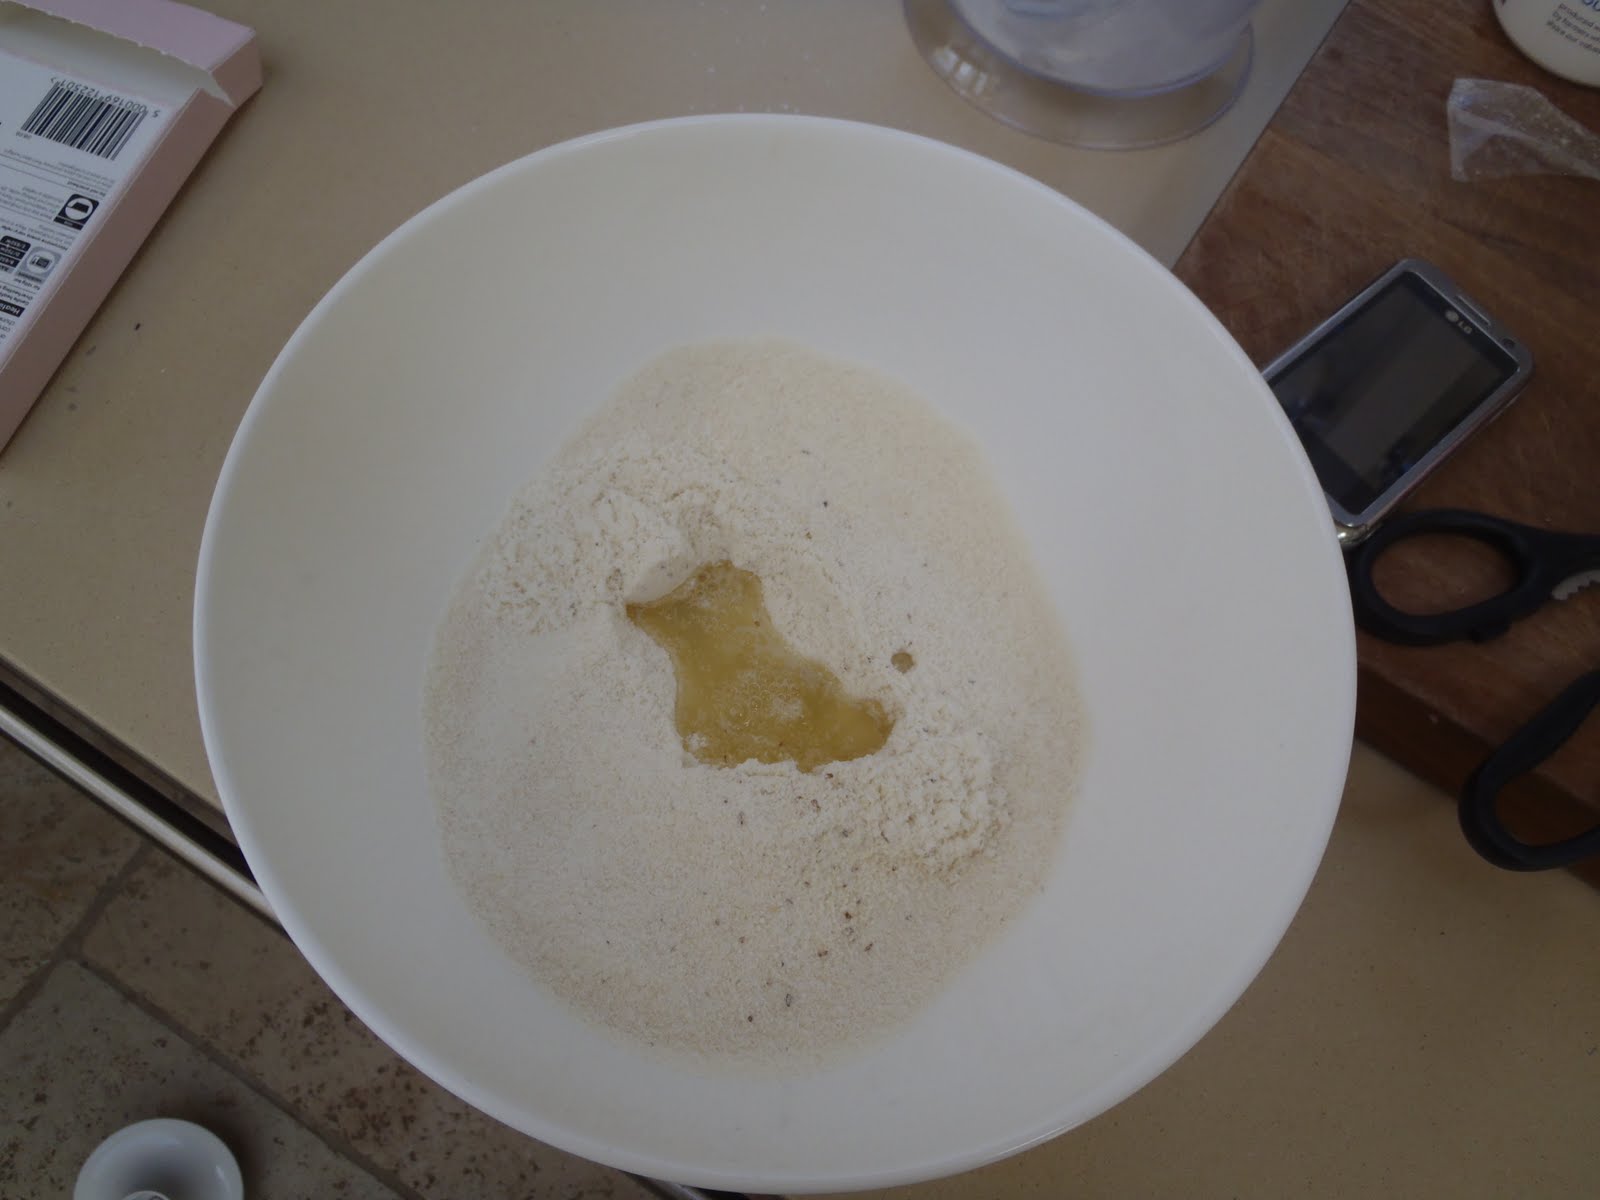
3. In a fairly big bowl (this will be the bowl containing all of batter by the end), sieve icing sugar and processed almonds, discarding leftovers. (If a significant amount of almonds remain in the sieve, add more ground almonds to compensate... common sense needed here)

4. Add one of your two bowls of egg whites to the almond and icing sugar mix. Mix together until all blended through. It may look as though you have too much powder, but keeping working it through, and I promise it will come together.


5. Cover with clingfilm, (making sure contact is made between paste and film).. this stops a crust forming on the paste.
Then move over to the meringue...
1. Pour second bowl of eggwhites into Kitchaid bowl (or large enough mixing bowl if you're using electric hand mixer). Leave to one side...
2. Measure out 150g caster sugar along with 37g water into pan. It doesn't look like 37g water will be enough, but once you place it on the heat, it will start to dissolve. DO NOT ADD MORE WATER THAN STATED.

3. Add food colouring (optional) to the pan at this stage.

4. Place pan on medium to medium-high heat. with thermometer probe inserted into syrup. Stir occasionally.
If you have never made sugar syrup before, a few tips...
Macarons can either be made with French (not with syrup) or Italian (sugar syrup) meringue recipe. Pierre Herme uses the Italian method, and so doea Ladymacaron20ten... therefore, I decided to start there!
Two of my failed batches were made with the french meringue method, and I didn't feel very comfortable with it. It is much easier to overbeat this batter... which makes it too runny, and then causes cracks in your little creations! The Italian method provides a little more slack for first timers... (i think they have a better texture too) So if I were you, go for the Italian method!
Before you start, prepare your baking tray and piping bag.
Baking tray... draw circle outlines (3.5cm diameter) on a few pieces of paper... I recommend using your computer and printing it out... it's a time saver. This is your template. Put these on baking tray and cover with a layer of baking paper (NOT greaseproof paper, as this is NOT the same thing)
Piping Bag... cut end of piping bag, and insert nozzle. Make sure that nozzle is firmly in.
So, here is the recipe for the Italian method...
Ingredients
For 'almond paste' For meringue
150g Ground almonds 150g caster sugar
150g Icing sugar 37ml (37g) water
55g Egg whites (Colouring of choice)
55g Egg whites
So this recipe consists of two constituents, the 'almond paste' (official name, Tant pour Tant), and the meringue.
Make almond paste...
1. Separate eggs into yolk and whites. In two small bowls weigh out EXACTLY 55g of the whites into each. (This can be fiddly, you have been warned!). One of these bowls of egg whites will be used for the paste, the other, for the meringue
2. Weigh out 150g of ground almonds.
Weigh out 150g of icing sugar.
Add almonds to food processor, and process for 3 minutes, until almonds are very fine.
3. In a fairly big bowl (this will be the bowl containing all of batter by the end), sieve icing sugar and processed almonds, discarding leftovers. (If a significant amount of almonds remain in the sieve, add more ground almonds to compensate... common sense needed here)

4. Add one of your two bowls of egg whites to the almond and icing sugar mix. Mix together until all blended through. It may look as though you have too much powder, but keeping working it through, and I promise it will come together.


5. Cover with clingfilm, (making sure contact is made between paste and film).. this stops a crust forming on the paste.
Then move over to the meringue...
1. Pour second bowl of eggwhites into Kitchaid bowl (or large enough mixing bowl if you're using electric hand mixer). Leave to one side...
2. Measure out 150g caster sugar along with 37g water into pan. It doesn't look like 37g water will be enough, but once you place it on the heat, it will start to dissolve. DO NOT ADD MORE WATER THAN STATED.

3. Add food colouring (optional) to the pan at this stage.

4. Place pan on medium to medium-high heat. with thermometer probe inserted into syrup. Stir occasionally.
If you have never made sugar syrup before, a few tips...
- Don't whack up the heat too high. (I did once, and ended having to buy a new pan)
- The sugar will start to boil, don't panic... just keep you eye on it.
- If the temperature doesn't seem to be increasing much, then increase the heat slightly
- patience is needed
6. Once syrup reaches 115°C, Put Kitchenaid to medium speed (4-6), or the middle setting on the hand electric mixer.
7. When syrup is at 118°C, the syrup is ready, and the egg whites should be at the right consistency (soft peaks, but not too soft).
8. Then, pour your sugar syrup into your egg whites in a thin stream, keeping the speed on medium.

9. Once all sugar syrup is in egg whites, turn speed to high and keep going. Check the temperature of your meringue every minute (using your digital thermometer).
10. Once meringue mix is at 50°C, it is ready!
Combining the two....
1. Add a third of you meringue mix to the almond paste. You can be quite vigorous here. Loosen the paste and combine together.

2. Add the rest of the mix to the paste. Gently fold the meringue in until all combined. Be careful not to over mix.

3. Lift spatula from bowl, batter should fall off in 'ribbons'... this is how you know it's ready. If you are scared to overmix then just mix until all combined.
 Almost there!
 RIBBONS!!
BATTER READY.
Piping and baking...

1. Turn oven to 150°C (conventional oven) or 135°C (convection oven) (these temperatures ensure no discolouration of shells)
2. Pipe onto baking parchment using templates underneath. After piping, remove paper!


3. Bang bottom of tray a few times. This gets rid of any air bubbles in the batter. After making that racket...Leave macarons to form a 'skin' for 15 minutes. Perfect time to start doing the washing up.
4. Put macarons in oven for 18 minutes.


5. Once cooked, remove pan from oven, and move baking parchment with macarons off tray. (Otherwise they will continue to cook).

6. Leave them to cool (25 minutes should do it), then remove shells from baking paper. They should be easy to remove, and pair into like sizes.
N.B. If they don't seem as soft as you want them to be, do not fret but read on...
They are now ready to fill with your ganache/buttercream or choice. Pipe onto one shell and then put the other shell on top. Keep in airtight container and keep in fridge. It is when they are in the fridge that the shell becomes softer! The shells infuse with the buttercream and become MUCH softer. So, no fear!

ENJOY!
If you have any particular issues... leave me a comment and I will try to get back to you with solutions, as I have probable done the same mistake as you at some point!
Remember... these aren't easy, and effort and patience are needed... but you WILL make it! We all will!
Going to try this out for myself now! :D
P.S. Check out LadyMacaron20ten's blog for a brill recipe and more piccies!!!!
A bad carpenter always blames his tools... except in this case... it IS the equipments fault!
Hello fellow macaroners!
If this is your first attempt at macarons, then be prepared to get through a fair few batches and washing up sessions before you produce something that resembles what we all love! I am yet to have a success! But have recently invested in PROPER equipment, so can't WAIT to try my next batch!
First and foremost, you NEED to make sure that you have the correct equipment. I tried without the correct equipment for 7 batches and surprise surprise... all fails!
I didn't have a kitchenaid (still don't) but Kenwood's version. Which would have been fine, BUT the whisk attachment was too wide, so whenever I poured in the sugar syrup, it would hit the whisk, go everywhere, so in the end I would be left with a whisk that had just been through a sugar syrup snow storm, and a bowl of over whipped egg whites! NOT a good start! Tried three different methods to try to overcome my equipment failure... even trying the french meringue method! In the end, I managed to persuade myself that I was obsessed enough to invest in some equipment. So I bought an electric mixer. (most households have one, but ours got lost, so had to buy one... £20) I also bought a digital theremometer (£18.50 from Selfridges). It took me A SERIOUSLY long time to find one. But this is definitely a worthwhile investment!
So equipment goes as follows,
Food processor (for almonds)
Sieve (for almonds and icing sugar)
KitchenAid/ electric hand mixer
Digital Thermometer
Baking Paper
Digital Scales (precision needed)
Piping Bag (disposbale ones from Lakeland are BRILLIANT)
Nozzles for batter (I use a 8 diameter nozzle)
For inspiration, top tips, and a good old browse, go to http://ladymacaron20ten.blogspot.com/ I'd put her up there with Pierre Herme! No joke... just check them out!
Off to try my batch with the pros equipment.... fingers crossed
p.s. when I remember and work out how to put photos up... I'll do just that!
Saturday, 9 April 2011
Obsession begins...
This is a blog dedicated to my baking obsession of the macaron!
I had my first taste when I was in Selfridges and the Pierre Herme stand was opening. They were giving out free tasters... so, my overwhelming sweet tooth combined with the 'must eat all free food' rule that I seem to live my life by (Is it telling that I am a student?), I nabbed one. And boy oh boy I'm glad I did. White truffle and hazelnut was the flavour... and that will be my ultimate aim... to recreate that masterpiece!

So, I am already on my way and want to use this blog to help other macaron fanatics on their mission too! Off we go….
Subscribe to:
Posts (Atom)